4 Days in The Andes Itinerary

Four days is enough for a focused introduction to Argentina’s Andes, provided you resist trying to cover the entire mountain chain. This itinerary uses Mendoza City as its gateway and follows the RN 7 high-mountain corridor toward Potrerillos, Uspallata, Puente del Inca, Las Cuevas and Aconcagua Provincial Park. It delivers immense scenery without pretending that a short holiday is an expedition.
Four-day Andes itinerary at a glance
- Day 1: Arrive in Mendoza, settle in and keep the day easy before heading higher.
- Day 2: Follow RN 7 through Potrerillos and Uspallata, continuing toward Puente del Inca and Las Cuevas if conditions allow.
- Day 3: Visit Aconcagua Provincial Park at Horcones with a valid advance reservation and a conservative walking plan.
- Day 4: Return to Mendoza, use the city as a weather backup and depart without squeezing in another major mountain journey.
- Best timing: November through March offers the most straightforward version; winter requires a more flexible plan.
Treat this as a highlights itinerary rather than a trekking program. Argentina’s tourism board recommends one or two days for Puente del Inca and two to five days for Aconcagua, so four days already demands careful priorities. Build the trip around one long corridor day, one park day and enough flexibility to respond to weather or road restrictions.
| Day | Main plan | Overnight |
|---|---|---|
| 1 | Arrival and an easy day in Mendoza | Mendoza |
| 2 | RN 7, Potrerillos, Uspallata and high-mountain stops | Mendoza or Uspallata |
| 3 | Pre-booked Aconcagua Provincial Park visit at Horcones | Mendoza |
| 4 | Lower-altitude buffer day and departure | Mendoza or onward travel |
Why Mendoza and RN 7 work for a short trip
Mendoza provides the practical base for this itinerary, while RN 7 creates a clear route into the high mountains. Official tourism information connects this corridor with Aconcagua, Puente del Inca, Las Cuevas and Cristo Redentor. Using one geographic corridor keeps the schedule coherent and avoids losing valuable days to transfers between distant parts of Argentina.

Aconcagua Provincial Park is about 180–185 kilometres from Mendoza. That distance makes the park a substantial outing rather than a quick side trip. Avoid building a tightly timed evening commitment after a mountain day, especially when your route includes several stops or winter conditions are possible.
If you are comparing this route with other Andean regions, the guide to the best places to visit in the Andes for first-time visitors provides a broader planning context. For a four-day Argentina trip, however, Mendoza and the RN 7 corridor offer the clearest balance of mountain scenery, recognizable landmarks and manageable logistics.
Day 1: Arrive in Mendoza and leave room to adjust
Use the first day to arrive, organize transport and confirm the next two days rather than rushing directly toward Aconcagua. Mendoza is the recommended base at the beginning and end of this schedule. A slower opening also leaves space for delayed flights, late arrivals or a change in the mountain forecast.
Check your Aconcagua reservation, the planned vehicle or tour pickup, and the latest RN 7 conditions. If the forecast looks poor, decide now whether to reverse Days 2 and 3. Park activities can be suspended because of adverse weather or force majeure, so the itinerary should remain adjustable until the mountain days are complete.
A useful first-evening checklist
- Confirm that the Aconcagua reservation matches the intended activity.
- Review official RN 7 and border-corridor updates.
- Prepare warm layers, sun protection and water.
- Download or save essential booking details for offline access.
- Ask your driver or operator how weather changes will affect the route.
Keep the evening relaxed and hydrate normally. The following days involve long road travel and a rapid change in elevation. There is no advantage in reaching the mountains tired, rushed or poorly prepared.
Day 2: Follow RN 7 into the high Andes
Start early enough to give the road, weather and viewpoints room to set the pace. The evidence-supported sequence follows RN 7 around Potrerillos and Uspallata before continuing toward Puente del Inca and Las Cuevas when conditions permit. Think of the drive as the main experience rather than dead time between attractions.
Potrerillos and Uspallata
Use stops around Potrerillos and Uspallata to break up the journey before the higher section of the corridor. Uspallata is also the logical overnight alternative for travelers who want to reduce backtracking. Staying there can make the next morning more efficient, but it places more of the trip inside a weather-sensitive mountain area.
Puente del Inca and Las Cuevas
Continue to Puente del Inca as the day’s principal named landmark. Las Cuevas can be added if the road remains suitable and the schedule still has breathing room. Do not let a desire to collect every stop push the return into uncomfortable conditions. Puente del Inca alone is a worthwhile anchor for this section of RN 7.
Cristo Redentor should remain optional rather than essential. Its border corridor is exposed to snow, strong winds and seasonal operating restrictions, particularly in winter. Check official road and border status immediately before departure, then follow closures and local instructions instead of relying on a forecast saved several days earlier.
Choose your overnight plan
Return to Mendoza if you value simpler logistics and a lower-altitude evening. Choose Uspallata if reducing backtracking matters more and the forecast is stable. The second option works best with flexible accommodation and transport arrangements because road conditions can disrupt a plan that looks straightforward on paper.
Day 3: Visit Aconcagua Provincial Park at Horcones
Make Aconcagua the central experience of Day 3, but match the activity to a four-day trip. The park entrance at Horcones is about 2,800 metres above sea level, while Aconcagua’s highest point reaches 6,962 metres. A short scenic park visit is fundamentally different from a long trek or summit attempt.

Select a permitted route or activity that suits the current season, weather and your response to the elevation. Keep your pace conservative, drink adequate water and carry warm layers and sun protection. A dry, cold environment and large temperature shifts can make a seemingly simple outing more demanding than expected.
The plain-English Andes acclimatisation guide is useful preparation before choosing the length of your Horcones visit. Within this itinerary, the smart goal is to experience the park without turning a scenic day into an endurance test. Stop or shorten the plan if conditions or personal comfort deteriorate.
Reserve park entry before leaving home
Arrange Aconcagua entry in advance through Mendoza’s official protected-area reservation system. Tickets are not sold at the entrances to the protected areas and must be reserved and paid online. Confirm that the selected reservation covers the activity you intend to undertake rather than assuming that every entry permits the same route.
Avoid scheduling a summit attempt or multi-day trek inside this four-day itinerary. Longer trekking and climbing involve different permits, preparation and commitments. This plan is designed for a short Horcones-area experience followed by a return to Mendoza, not a compressed mountaineering program.
Day 4: Keep a lower-altitude buffer in Mendoza
Use Day 4 as a lower-altitude day in Mendoza and a buffer before departure. This protects the trip from becoming a chain of long drives and gives you somewhere practical to place an activity displaced by weather. If the first three days ran smoothly, keep the final day easy rather than attempting another distant mountain excursion.
Travelers who stayed in Uspallata on Day 2 should aim to be back in Mendoza before the final departure window becomes tight. Those who slept in Mendoza throughout already have the simplest finish. In either case, avoid pairing a long RN 7 return with an inflexible same-day connection.
The strongest four-day plan leaves one day flexible. In the high Andes, spare time is useful equipment.
Choose between one base and a corridor overnight
| Plan | Advantages | Main limitation |
|---|---|---|
| Mendoza every night | Simpler arrival and departure, plus easier lower-altitude recovery | Long out-and-back mountain days |
| One night in Uspallata | Less backtracking before the Aconcagua day | Greater exposure to weather and RN 7 disruptions |
For most first-time visitors, Mendoza every night is the safer planning default. It keeps luggage in one place and makes the fourth-day buffer easy to use. The Uspallata option suits travelers who accept more logistical commitment in exchange for less repeated driving.
When to take this four-day trip
November through March is the recommended visitor season for Aconcagua. Mendoza’s administrative summer season runs from November 1 through April 30, so those dates are related but not identical. For the most straightforward version of this itinerary, prioritize the recommended November-to-March window while checking the conditions and reservation rules for your exact dates.
The park’s formal winter season runs from May 1 through October 30. Winter activities require a written application and authorization. An August trip therefore needs a different mindset: prioritize a guided high-mountain sightseeing day, retain a Mendoza backup and do not assume that routine park hiking will operate as it does in summer.
RN 7 and the Cristo Redentor corridor receive winter maintenance, but maintenance does not remove the risk of snow, strong winds or temporary restrictions. Check official status immediately before setting out. If conditions deteriorate, shorten the route instead of trying to preserve every stop on the original schedule.
Booking and budgeting without false precision
Book the Aconcagua activity through the official reservation system before traveling. Then price the remaining components separately: Mendoza accommodation, an optional Uspallata night, transport, guiding, meals and any equipment required for the selected activity. This creates a more useful budget than a single package estimate that hides major differences in comfort and transport style.
Park fees vary by activity and visitor category, and permit charges do not include transport, lodging, food, guides or equipment. Use the current tariff shown during the official reservation process. Older published permit figures should not be treated as the price for a 2026 trip.
If booking a guided RN 7 excursion, compare the route, park entry arrangements, pickup point, cancellation conditions and response to road closures. A lower advertised price is not useful if the itinerary omits the stop that matters most to you or leaves park reservations entirely to the traveler.
Altitude, weather and road safety
Horcones is high enough to justify a cautious pace even though this itinerary does not involve climbing Aconcagua. Keep the visit short if you are not accustomed to elevation, avoid turning the day into a race and leave enough energy for the return journey. The mountain’s summit elevation is not a target for this trip.
Pack for cold, sun and rapid changes rather than dressing only for Mendoza. Warm layers, sun protection and adequate water belong in the vehicle even on a clear morning. Park activities can be suspended during adverse weather, so a cancellation should trigger the Mendoza backup plan rather than an improvised attempt elsewhere in the corridor.
Road status is especially important in winter. Snow and strong winds can affect the international corridor, and official restrictions can change after an earlier forecast was issued. Check conditions on the morning of travel and follow current closure notices, even if a tour description or saved itinerary presents the route as fixed.
What to pack for the high-mountain days
- Warm layers that can be added or removed as temperatures change.
- A wind-resistant outer layer for exposed stops.
- Sun protection, including sunglasses and sunscreen.
- Enough drinking water for the chosen outing.
- Comfortable footwear with grip for uneven ground.
- Saved copies of park reservations and transport details.
Keep essential layers and water with you rather than buried beneath luggage. If you are joining a guided trip, review the operator’s equipment list because requirements depend on the season and activity. A scenic stop and a permitted trekking route do not demand the same preparation.
Transport and accessibility planning
Choose between a guided high-mountain excursion, private driver or self-drive plan based on your comfort with long mountain days and changing road conditions. Guided transport can simplify the day, while a private arrangement provides more control over stops. Self-driving requires the greatest attention to RN 7 status and winter restrictions.
Do not assume that every stop, trail, toilet or vehicle is step-free. Travelers who need accessible transport, adapted lodging, oxygen-related support or specific mobility arrangements should confirm them with the park reservation system and chosen transport provider before booking. Requirements can differ between Horcones, roadside viewpoints and accommodation.
A focused itinerary with room for the mountains
This four-day Andes itinerary suits travelers who want a first look at Argentina’s high mountains without committing to a trek or climbing program. Mendoza keeps the logistics manageable, while RN 7 brings Puente del Inca, Uspallata and Aconcagua into one coherent route. The chief limitation is the amount of road time, especially when returning to Mendoza each night.
Reserve Aconcagua in advance, protect one day as a buffer and let current conditions determine how far you travel. With that flexibility, four days can feel substantial rather than rushed. The goal is not to conquer the Andes, but to experience one of their most dramatic Argentine corridors with enough time and judgment to enjoy it.
Frequently asked questions
Can you see the Argentine Andes in four days?
Yes, if you focus on one corridor rather than trying to cover the Andes across Argentina. Mendoza, RN 7, Puente del Inca and Aconcagua Provincial Park form a practical four-day highlights route.
What is the best base for this itinerary?
Mendoza City is the most practical base for arrival, departure and a lower-altitude backup day. Staying one night in Uspallata reduces backtracking but creates more exposure to mountain road and weather disruptions.
How far is Aconcagua Provincial Park from Mendoza?
Aconcagua Provincial Park is about 180–185 kilometres from Mendoza via RN 7. Allow for a substantial mountain outing rather than treating it as a short city excursion.
Do I need to book Aconcagua Provincial Park in advance?
Yes. Entry must be reserved and paid online before arrival because tickets are not sold at protected-area entrances. Select the reservation that matches your intended activity.
Can I follow this itinerary in August?
Yes, but August requires a winter version with considerable flexibility. The formal winter season runs from May 1 through October 30, winter activities require application and authorization, and RN 7 can be affected by snow and strong winds.
Is four days enough to climb Aconcagua?
No. This itinerary is for sightseeing and a short permitted park visit, not a summit attempt or multi-day trekking program. Aconcagua reaches 6,962 metres, and expedition activities require different preparation and permits.
Should I stay overnight in Uspallata?
Stay in Uspallata if reducing backtracking matters more than having a simple Mendoza base. Remaining in Mendoza is easier for arrival and departure, while Uspallata commits more of the schedule to a weather-sensitive corridor.
Is this itinerary wheelchair accessible?
Accessibility must be confirmed for each vehicle, stop and planned park activity. Travelers needing step-free access, adapted lodging or additional support should check arrangements with the park reservation system and transport provider before booking.
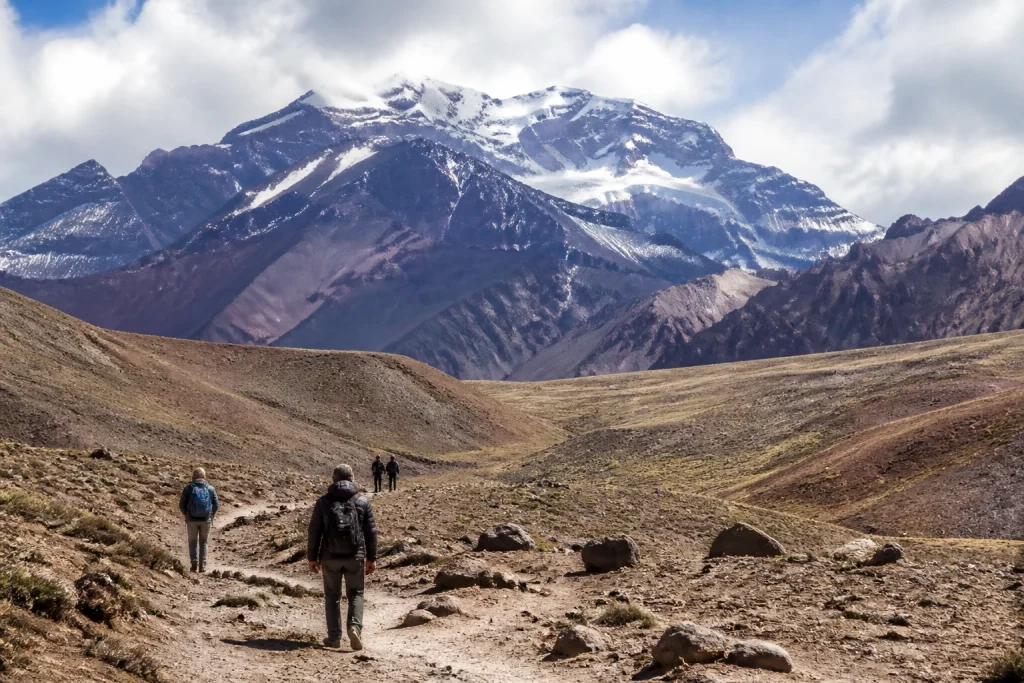
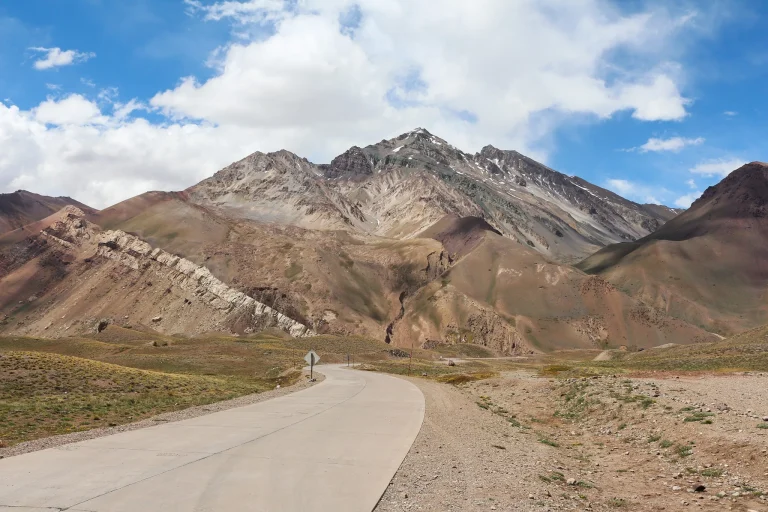
Aconcagua is the defining landmark of Mendoza’s RN 7 high-mountain corridor by Claudio Mota, Pexels.
More bookable experiences
Three tours to compare
Review current provider details before booking. Discover Andes may earn a commission at no extra cost to you.
Continue exploring
More practical guides selected from the Discover Andes library.
The Andes Souvenir Shopping Guide
Shop the Argentine Andes with confidence, using Salta as a base for regional textiles, ceramics, woodwork, basketry, gaucho…
The Andes Summer Travel Guide
Plan an Argentine Andes summer trip with practical advice on choosing Mendoza, Bariloche, or the high-altitude northwest, plus…
5 Days in The Andes Itinerary
Spend five focused days exploring Mendoza wine country, the RN 7 mountain corridor, Puente del Inca, Horcones, and…
The Andes Shopping Guide
Plan a Mendoza-led shopping trip through the Argentine Andes, with practical advice on artisan markets, regional crafts, wine…